Tuesday, 28 April 2015

Blueberry buns!

Continuing from my previous post, today I am going to share with you how to make these blueberry buns. The ingredients are required for the bun is the same with the pizza base ingredients, with the addition of dried blueberries.


You will need:
(8-9 buns)

400g bread flour
40g of butter
6g yeast
80g sugar
200g warm water
lots of dried blueberries

Steps:


1. Mix in dry ingredients in a large mixing bowl, then slowly add in the water at intervals while kneading it until a dough is formed. It may be sticky at first when you knead, but when the dough is done, it should not stick to your hands
2. Cover the dough and let it ferment for at least 90 mins at room temperature.
3. Divide the dough into 8-9 equal portions, then make them into a sphere shape, then press it down so it is slightly flat, then make a hollow and add in a handful of dried blueberries, then close it up and then reform the sphere, make sure the dried blueberries are well packed inside and that the surface of the bun is smooth with no big cracks. 
I have done experiments testing the effect of having cracks on the surface and not, as well has having blueberries peeping out on the surface and not (as you can tell from the picture above, some has a more smooth surface, some looked more like scones lol). The ones that had blueberries peeping out, they fell out as the bun rises in the oven.  So I suggest to keep all the dried blueberries in and keep the surface smooth. If there are cracks that you can't fix, keep the cracked side facing down in the oven tray.
4. Preheat the oven to 180-200C, then place the buns in the oven for 15-20mins.

You may apply a layer of egg yolk on the surface to give a shiny glaze. I did not do that because I ran out of eggs at home. Now my buns looks as if it's really dry, and a bit like scones as well haha. But in fact they taste quite good and are 100% buns!!! (not scones..)


Saturday, 25 April 2015

Homemade Pizza!!

Today I am going to share with you how to make your own pizza from scratch. This is a recipe I got from my mum.


You will need:
(3-4 servings)

400g bread flour
40g of butter
6g yeast
80g sugar
200g warm water

Steps:

1. Add in all the ingredients except water in a large mixing bowl.
2. Slowly add in water at intervals, while mixing and kneading the ingredients until a dough forms.
3. Cover your mixing bowl, allow to fermentate for at least 90 mins.
4. Preheat oven at 200C.
5. Divide into 4 equal portions, and using your hand or rolling pin to flatten it into a thickness of about 2-4mm.
6. Roll up the edges of the pizza base.
8.Apply a layer of tomato paste, add in a little water so that it is easier to spread.
9. Add in your favourite pizza toppings and finally add mozzarella cheese. In my pizza, I added onions, diced peppers, small ham slices, diced pineapples, sweetcorn.
10. Place your pizza into the oven for 15-20 mins.
11. Let it cool in the rack so the base does not go soggy.

Yes:P This picture is filtered 


#nofilter


I used this pizza base recipe to make blueberry buns as well, and it tasted good too! Please check out my next post for my blueberry buns recipe.

Tuesday, 21 April 2015

A little Trick for peeling Kiwi Fruit

Hi, today's post is a little different because it is not about cooking recipes, but an interesting trick I learnt from my sister. Most people tend to just cut kiwis in half and eat the flesh with a spoon or maybe peel it with a knife. I don't know where my sister learnt that from, and perhaps some of you might know it already, but to me, it's a really cool way to peel kiwi fruits. I thought it was really clever of my sister when I first saw it:P

Method:

1. Cut the ends of the kiwi fruit.


2. With a tablespoon, push it through the kiwi fruit as close to the skin as possible.


3. Then push the spoon away from you and makes your way around the kiwi fruit. The skin should come off nicely in one whole piece.


You can then just eat it whole like you eat apples (if you are lazy like me), or you may slice it into thin slices.

I personally think this is a much neater way of peeling kiwi fruits, and also safer and more convenient for those who are not good at using knifes.

Friday, 17 April 2015

Pork Ribs Basking in its Glory

Found an online recipe and decided to try it out, and it turned out really good! I am definitely going to make this again! I cannot wait to share this goodness with you!


You will need:
(2 serving)

8 pork ribs
3 1/2 tablespoon sugar;
3 1/2 tablespoon soy sauce
1 tablespoon diced garlic

Steps:

1. Cook the ribs.
2. Marinate the ribs with garlic and leave it for at least 45 mins.
3. Heat the ribs in a pan and then add in soy sauce and sugar as the sauce.
4. Cook until the sauce thickens and forms a glaze coat on the ribs.

I decided to plate it with some salad and rice.


Tuesday, 14 April 2015

Potato Chicken (Upgraded Version)

Remember my Potato Chicken recipe in my earlier posts? Today I am going to share with you another version of the Potato Chicken. This time, tthere are more ingredients and the sauce is less thick and more watery.

You will need:
(4 servings)

1 big potato or 2 small sized 
3 Chicken thighs (use boneless thighs to make life easier)
A handful of Chinese vermicelli 
2-3 carrots
Soya Sauce
Pinch of sugar
Pinch of corn starch
pinch of salt
Oyster sauce
soy sauce
Cooking oil
water

Steps:
1. Soak in the Chinese vermicelli with water to allow it to soften.
2. Dice up the chicken into bite-sized pieces.
3. To marinate the chicken, add in about 1.5 tsp of soya sauce, a pinch of sugar and some corn starch. 
4. "Massage" and mix it. Leave it for at least 20 mins.
5. Dice up the potatoes and carrots into bite-sized cubes. 
6. Add some oil to a heated pan.
7. Fry the potatoes until the sides turns slightly brown.
8. Add in about 3/4 cup of water and put the lid on to let it cook.
9. When all the water is gone, try and see if it is cooked on the inside, if not, add more water.
10. Boil the carrots till it turns soft.
11. Fry the chicken at medium heat in a cooking pan. 
12. When it is 90% done, add in the potatoes and carrots.
13. Add in water till it covers up the ingredients, then add in 3 spoons of oyster sauce, 2 spoon of soy sauce, a pinch of sugar.  Add in the Chinese vermicelli. Taste it along the way and adjust flavour to your reference.

Again, this dish is perfect with rice.


Saturday, 11 April 2015

Breakfast Time! Ham and Cheese Muffin~

Today's post is not about snacks nor main meal dishes, but a breakfast recipe:) I got bored of having the normal breakfast I have every day. I used to have cereal and now I just grab a fruit and eat it on the go since I'm always in a hurry in the morning. Since it's Easter holiday, I have a bit more time to spend, so I decided to make this Ham and Cheese Muffin! 

 You will need:

2-3 slice of cooked ham
1 muffin
1 slice of processed cheese

Steps: 
(using an oven toaster)

1. Cut the muffin in half and place it in the toaster and toast it until golden brown.
2. Take it out and place the ham and cheese on top of one of the muffins, then place it back in the oven toaster to allow the cheese to melt.
3. Then add the other muffin on top and keep it in the oven toaster for another 1-2 mins.

If you use a pop toaster, follow the steps below:

1. Cut the muffin in half and place it in the toaster and toast it until golden brown.
2. Take it out and place the ham and cheese on top of one of the muffins, then place it in the microwave for 15 seconds to allow the cheese to melt.
3. Then place the other muffin on top and there you go:)


See the melting cheese and the golden brown muffin?
Took this picture when it is hot and just out of my oven toaster! 
Makes me salivate just by looking at the picture. ><

Wednesday, 8 April 2015

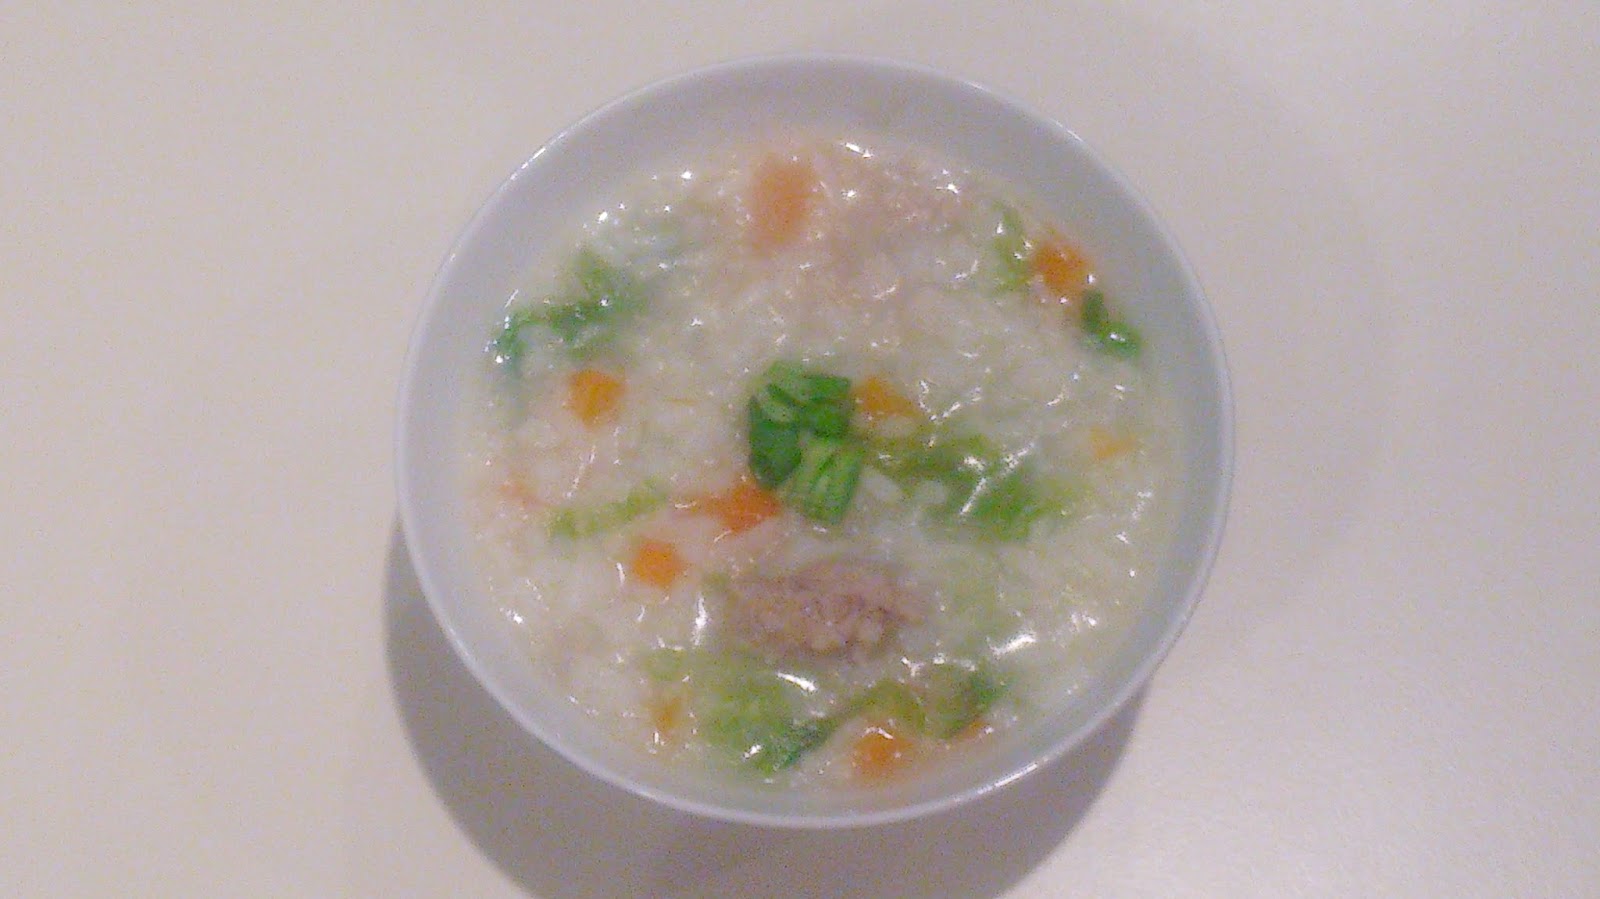
Congee Upgraded Version!

Remember I posted a recipe on making congee? This time, I've come back with an upgraded version haha. I've tossed in a few more ingredients, making this a more colourful and filling congee.


You will need:

(2 servings)

1 cup of rice

6 cups of water
1 carrot
mince meat (size of your fist)
2 slices of ginger
one strip of spring onion
6 dried shrimps
iceberg lettuce
soya sauce
sugar
corn starch.

Steps:
1. Wash the dried shrimps and soak it in water for 15 mins. Then drain off the water.
2. Wash the rice twice, then add in the water. Let it cook in the rice cooker. Add in the dried shrimps as well.
3. Marinate the mince meat with some soya sauce, sugar and corn starch. 
4. Cut the ginger into thin strips,. Peel and dice up the carrots and add it to the congee. Add in the ginger as well.
5. Keep stirring at times and be careful when it starts boiling up.
6. Add in the marinated mince meat. Add a pinch of salt to give more the congee some flavour. 
7. Wash some lettuce and cut them up. Add it into the rice cooker.
8. Some rice cookers tell you when the porridge is done, but if it doesn't, when it thickens, taste it and adjust it to your preference by leaving it to cook longer or add more salt if you prefer a stronger taste.
9. When it is done, plate it in a bowl, and add some cut-up spring onion for decoration, it also enhance the taste to the congee.


Monday, 6 April 2015

First time making Kimbap!

Hi! Today I am going to start this post with a little guessing game:) Can you guess what I am going to make with these colourful ingredients?

Scroll down and you will see:)
-
-
-
-
-
-
-
-
Keep scrolling:P
-
-
-
-
-
-
-
Ta-da! It's another Korean dish called Kimbap! I really like this dish/snack because of how colourful it is. For those who does not know what kim-bap (김밥) is, it literally translate to "dried seaweed- rice". It is actually Korean Style Sushi, a very popular and affordable dish/snack in South Korea. For those who is not a big fan of sashimi, you can try this as an alternative to Japanese sushi.

You will need:
(2-3 servings)

3-4 strips of yellow radish
1 carrot
3-4 strips of cucumbers
3 eggs
mince pork (size of your fist)
4 bowls of rice
3-4 sheets of dried seaweed
sesame oil
salt
soy sauce
sugar
corn starch

Steps: 

1. Wash the rice twice and cook it in the rice cooker. 
2. Prepare the ingredients. First, marinate the mince meat with sugar, soy sauce, sesame oil and corn starch. 
3. Then beat up the three eggs, and pour it into frying pan, let it fill the bottom of your prying pan, and then fold it into half when the eggs are half cooked. 
4. Peel the carrots. Cut the carrots, cucumbers, yellow radish, and egg omelette into strips.
5. Fry the meat with a little oil.
6. Now that you have all the ingredients ready and when the rice is done. Here comes the fun part:P
7. Just before we start, mix the rice with 3 teaspoons of sesame oil and sprinkle some salt. Let the rice cool down a little bit till it's warm.
8. Lay on a flat surface a sheet of dried seaweed, then add a thin layer of rice that covers the entire surface of the seaweed. then put one strip of all the ingredients and line the mince meat there as well. (The picture below shows the layout, but I suggest to have the pork close to the other ingredients, so the top part of the picture will have just the rice and will stick better)
9. Slowly roll it from the side with all the ingredients (ie start from bottom of picture) while squeezing it gently, with some pressure, but not too much that you break the seaweed.


10. Apply minimal sesame oil onto the surface of your sushi roll. Not only does it look better, giving a shinny effect, but also makes it easier when cut the roll into bite size pieces. And of course, sesame oil just makes the kim-bap taste even better!


You may have your kim-bap with soya sauce, or with yellow radish or kimchi.


This is my second attempt making kimbap, I used ham instead of minced pork.

Friday, 3 April 2015

First Attempt making Kimchi Fried Rice!

Hi everyone! Today's recipe is going to be a little spicy, it's Korean Kimchi Fried Rice (김치볶음밥). Without further introduction, let's get into it straight away!


You will need:
(2-4 servings)

3-4 bowls of rice
3/4 bowl of kimchi
1/2 bowl of kimchi juice
2-3 tablespoon of korean red pepper paste
1-2 carrots
cooking oil
mince pork (size of your fist)
soy sauce
sugar 
corn starch
sesame oil
dried seaweed (optional)
eggs (one egg per serving)


Steps:
1. Marinate the mince pork using soy sauce, sugar, sesame oil and corn starch. Fry the pork.
2. Dice up the carrots and boil it.
3. Fry the kimchi with some cooking oil in a frying pan. This helps to store the juice within the kimchi, so when you bite into it, it's more juicy.
4. Add in the rice, and kimchi juice, carrots and the mince pork and keep frying.
5. Add in a bit of sesame oil for more fragrance.
6. On a separate frying pan, fry a sunshine egg as a decoration. You may add in some dried seaweed and spring onion as well for decoration.

Tip: if you want to create nice and round shaped egg without the use of a shaping mould, you can cut out a piece of onion and place it in the frying pan and the have your egg inside it. See picture below:

Thursday, 2 April 2015

Ice Cream Dessert

Hi! Today is a little different, rather than showing you a main meal dish recipe, this is going to be a quick dessert that even kids can make! I bought some vanilla ice cream the other day and just thought.. having just ice cream is a bit boring, so I just kind of spice it up with what ever I found in my kitchen:) Just like when you have frozen yoghurt in dessert shops where you mix and match toppings, I just did the same but with ice-cream! Taste just as good. Should give this combination a try:)


You will need: 
(1 serving)

Vanilla ice cream
Honey
Bananas

I just add the ingredients randomly, so did not really keep track on the actual amount used. so the measurings mentioned below just the estimated numbers. But really, you can just add whatever you want and adjust the quantity to your preference.


Steps:

1. Cut up some bananas, I used about half a banana for my bowl of ice cream above.
2. Add in about 2 scoops of vanilla ice cream and add in the bananas.
3. Drizzle some honey on top. 

Highly recommend adding in some biscuit crumbs/chunks, it really goes with the dessert, and adds more texture to it. Digestives, oreo and rich tea biscuits are my personal favourite choices of biscuits to add.