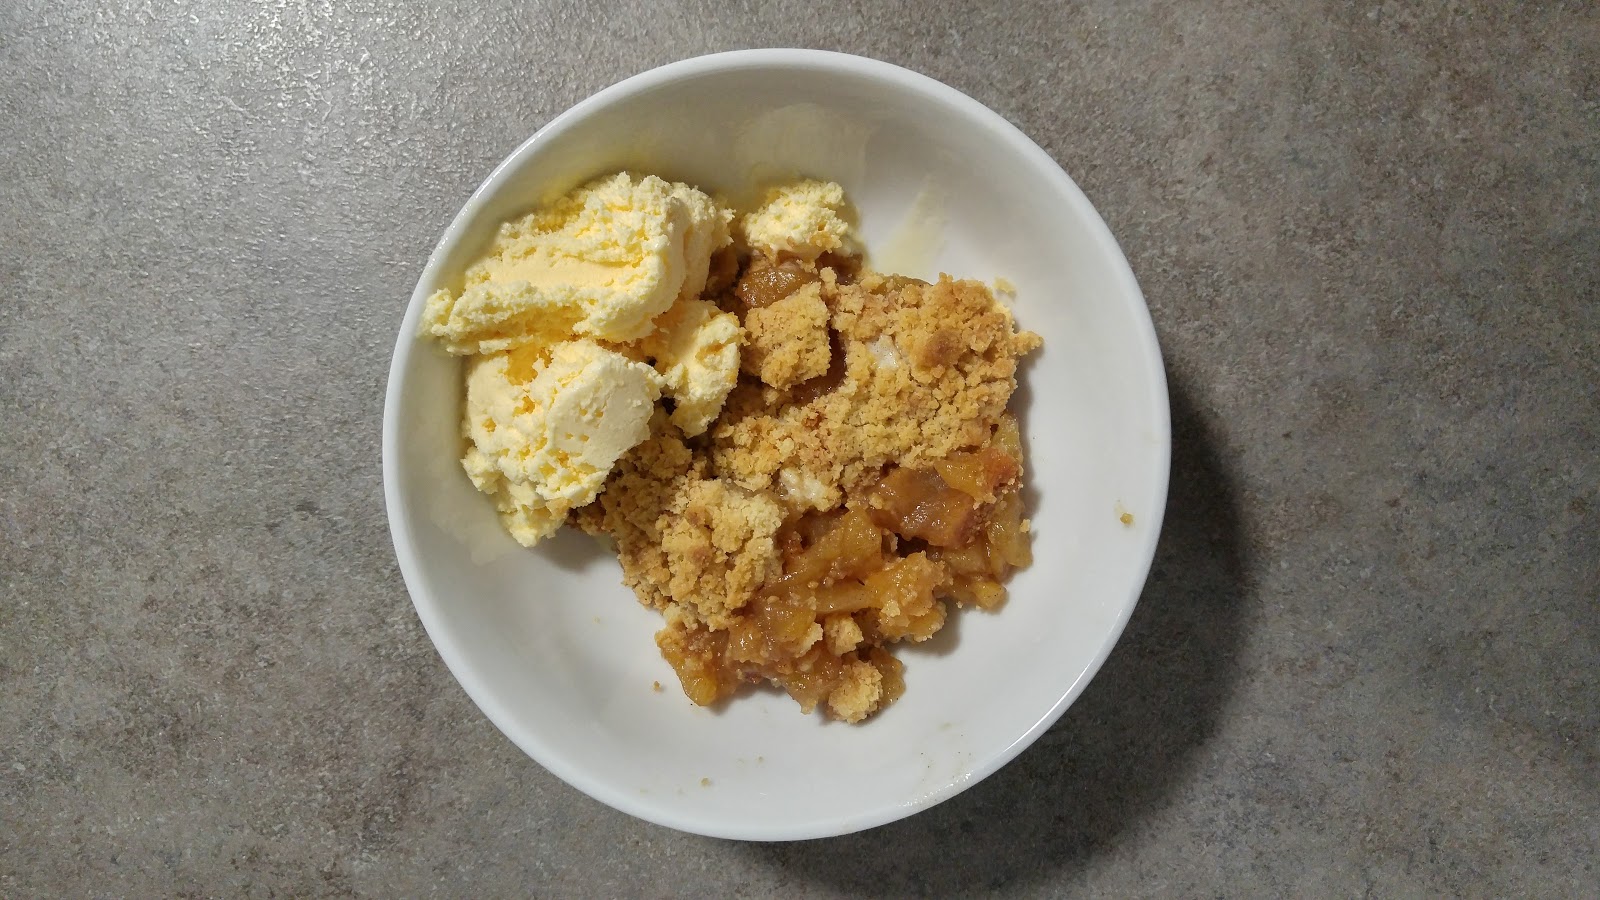
This is a quick update post for a newly adapted recipe that I experimented based on the previously uploaded apple/plum crumble recipe. Recently I created a pear crumble and thought I shall update you guys as it is a really delicious recipe and I can't wait to make more! The procedures are exactly the same as in the previous post but I have included here for your convenience:)
Didn't take any nice shots before I gulp down my crumble. Bare with me just this time:) Now straight into the recipe!
You will need:
(2-3 servings)
3 conifer pears
honey or sugar
some cinnamon
grated ginger
half cup of water
For the crumble:
200g plain flour
120g butter
60g sugar
Method:
1. Peel and dice the pears, heat and stew on medium heat in a saucepan. Add also some honey and water along with some cinnamon, These ingredients can be adjusted depending on personal paste, feel free to taste along the way as you cook. If you want a more spicy flavour, more ginger can be added. Sweetness depends on the pears itself and can be adjusted by adding honey or sugar. Once you are satisfied with the taste, take it off the heat let it cool.
2. Meanwhile, mix in the sugar and plain flour, add in the butter in small chunks and then with your hands, melt the butter and mix it until they become crumbs, you can also put pressure to the crumbs to create slightly larger crumbs.
3. Preheat the oven to 150C. Spread your apple mixture on a baking tin or gratin dish, then sprinkle your crumbs on top. Place it in the oven until you see the crumbs turn golden brown. This should take about 30-45mins.
4. Take it out of the oven when it is done and allow to cool. Serve with ice cream/ custard/ double cream. (Ice cream and crumble is my fav combo:P)

Tuesday, 14 February 2017

Oyako Donburi (親子丼)
If you haven't already guessed by the picture, today's recipe will be on a Japanese dish called Oyako Donburi. I actually made this awhile awhile back in January, but have not had the time to type up this post. But here it is! While procrastinating from uni work, might as well do something more productive! Hence another blog post updated after such a long time.

You will need:
(2 servings)
3 chicken thigh fillets
1 onion
2-3 eggs
some spring onions
cooking oil
For the sauce:
2 tbsp soy sauce
2 tbsp of mirin
half cup of water
Method:
1. Cut the chicken thighs bite sized. Cut the onions into thin strips, and chop up some spring onions.
2. Add some cooking oil to a frying pan and gently fry the chicken until half cooked.
3. Add the onions and continue to fry for a few mins, add in all the sauce ingredients and let it cook till boiling.
4. Meanwhile, gently beat two eggs ( do not fully mix the yoke and white), pour in 3/4 of the whisked eggs into the pan evenly.
5. Let the egg cook till yellow and white are seen, then pour in the remaining egg. Cook for 1-2 mins.
6. Serve with rice and decorate it spring onions.


Tuesday, 10 January 2017
Post Exam Baking :D
Just had my one and only Jan exam yesterday, finally I could have some rest time after some intensive revision the past few days. Could have done better in the exam but oh well, it's done and dusted. I shall not think about it anymore and enjoy my little break before uni starts again. Yesterday, as soon as I got home after exam, I did a big clean up in my room since I hadn't had time to keep to my cleaning routine during exam period, but now, it's all nice and shinny and smells of the signature Dettol fragrance! haha! AND, finally, I got to do some baking:) I have been longing to bake especially when I was revising. ( I swear I am not the only one who just finds everything else other than revision so much fun when I revise for exams!) Since there were a few apples that had been sitting in my kitchen for quite a while now, so I decided to make apple crumble with it! While my sister was here during the Christmas holiday, I let her made plum crumble for me and my flatmates for the first time, it turned out to be quite easy to make and so it was a great success and we all enjoyed it a lot. So, I decided to try it out myself this time using apples instead.

You will need:
(4-6 servings)
6 red apples
~70g sugar
some cinnamon
1/4 cup of water
For the crumble:
200g plain flour
120g butter
60g sugar
Method:
1. Peel and dice the apples, heat and stew on medium heat in a saucepan. Add also the sugar and water along with some cinnamon, These ingredients can be adjusted depending on personal paste, feel free to taste along the way as you cook. Take it off the heat until the apples are soften and let it cool.
2. Meanwhile, mix in the sugar and plain flour, add in the butter in small chunks and then with your hands, melt the butter and mix it until they become crumbs, you can also put pressure to the crumbs to create slightly larger crumbs.
3. Preheat the oven to 150C. Spread your apple mixture on a baking tin or gratin dish, then sprinkle your crumbs on top. Place it in the oven until you see the crumbs turn golden brown. This should take about 30-45mins.
4. Take it out of the oven when it is done and allow to cool. Serve with ice cream/ custard/ cream. (Ice cream and crumble is my fav combo:P)


I shall share the recipe for the plum crumble as well.
Ingredients:
(4-6servings)
~ 600g riped plum
~60g of sugar
1/4 cup of water
For the crumble, please refer to above mentioned.
Method:
1. Dice the plum and mix in the sugar with 1/4 cup of water , spread it directly on a baking tin or gratin dish.
2. The crumble can be made as mentioned above in the apple crumble recipe. Preheat the oven 150-160C and bake for 45mins.


You will need:
(4-6 servings)
6 red apples
~70g sugar
some cinnamon
1/4 cup of water
For the crumble:
200g plain flour
120g butter
60g sugar
Method:
1. Peel and dice the apples, heat and stew on medium heat in a saucepan. Add also the sugar and water along with some cinnamon, These ingredients can be adjusted depending on personal paste, feel free to taste along the way as you cook. Take it off the heat until the apples are soften and let it cool.
2. Meanwhile, mix in the sugar and plain flour, add in the butter in small chunks and then with your hands, melt the butter and mix it until they become crumbs, you can also put pressure to the crumbs to create slightly larger crumbs.
3. Preheat the oven to 150C. Spread your apple mixture on a baking tin or gratin dish, then sprinkle your crumbs on top. Place it in the oven until you see the crumbs turn golden brown. This should take about 30-45mins.
4. Take it out of the oven when it is done and allow to cool. Serve with ice cream/ custard/ cream. (Ice cream and crumble is my fav combo:P)

Ingredients:
(4-6servings)
~ 600g riped plum
~60g of sugar
1/4 cup of water
For the crumble, please refer to above mentioned.
Method:
1. Dice the plum and mix in the sugar with 1/4 cup of water , spread it directly on a baking tin or gratin dish.
2. The crumble can be made as mentioned above in the apple crumble recipe. Preheat the oven 150-160C and bake for 45mins.

Korean Street Food - Rice cakes 떡볶이
While my sister was with me last week, the last night before she left for university. We made korean style rice cakes! Spicy and filling food that is perfect for the winter!

You will need:
(2-3 servings)
2 handfuls of rice cakes
3 fish cake sticks ( usually it is in a flat sheet form, but I only found the ones in long stick form from my local asian groceries store, which works equally fine.)
We also added some assorted chinese fish balls, homemade dumplings, and a pack of instant noodles to give more variety.
For the sauce:
1 tbsp of hot pepper flakes
1tbsp of sugar
1.5 big spoonfuls of korean hot pepper paste
4-5 cups of water
some spring onions and sesame
Method:
Note: If your rice cakes are frozen, defrost it at room temperature, and then wash it under cold water. Do not cook directly from frozen, as it will be hard to fully cook the inside. Defrost any other frozen ingredients as well in room temperature.
1. In 4 cups of hot water, add in the hot pepper flakes, sugar and hot pepper paste and bring it to a boil.
2. Add in the rice cakes, fish cakes and fish balls and let it cook till soften.
3. Meanwhile, fry the dumplings on a seperate and also cook the instant noodles. It is best to cook the noodles separately then add it in at the end to the main, since the noodles will be hard to cook as the sauce starts to thicken, but if you add too early before it thickens, it will become soggy for leaving it cooking for too long.
4. As the sauce starts to thicken, taste it and adjust the sauce accordingly, If the consistency becomes too thick, add a bit of water.
5. Finally add in the dumplings and noodles, and add the spring onions on top and some sesame which is optional.
6. Grab your cutlery and dig in!!


You will need:
(2-3 servings)
2 handfuls of rice cakes
3 fish cake sticks ( usually it is in a flat sheet form, but I only found the ones in long stick form from my local asian groceries store, which works equally fine.)
We also added some assorted chinese fish balls, homemade dumplings, and a pack of instant noodles to give more variety.
For the sauce:
1 tbsp of hot pepper flakes
1tbsp of sugar
1.5 big spoonfuls of korean hot pepper paste
4-5 cups of water
some spring onions and sesame
Method:
Note: If your rice cakes are frozen, defrost it at room temperature, and then wash it under cold water. Do not cook directly from frozen, as it will be hard to fully cook the inside. Defrost any other frozen ingredients as well in room temperature.
1. In 4 cups of hot water, add in the hot pepper flakes, sugar and hot pepper paste and bring it to a boil.
2. Add in the rice cakes, fish cakes and fish balls and let it cook till soften.
3. Meanwhile, fry the dumplings on a seperate and also cook the instant noodles. It is best to cook the noodles separately then add it in at the end to the main, since the noodles will be hard to cook as the sauce starts to thicken, but if you add too early before it thickens, it will become soggy for leaving it cooking for too long.
4. As the sauce starts to thicken, taste it and adjust the sauce accordingly, If the consistency becomes too thick, add a bit of water.
5. Finally add in the dumplings and noodles, and add the spring onions on top and some sesame which is optional.
6. Grab your cutlery and dig in!!

 |
| Made a little edit on instagram :P |
Monday, 26 December 2016
3-in-1 Deep Fried Chicken for Boxing Day
So it is Boxing Day today, and my little sister is around to spend the holiday with me, we thought why not do something more fun! Deep fried is not something I do very often purely because it is quite unhealthy as it uses a lot of oil and the oil splashing as it sizzles makes it a hazzle to clean afterwards but afterall it is a guilty pleasure to have some deep fried chicken once in a long while. We deep fried a whole kilogram worth of chicken so we thought we should spice it up by creating more flavours rather than just having original flavour with ketchup. Korean style marinate sauce has always been my favourite out of all the korean style deep fried chicken flavours. We also have some quite ripe plum and my sister thought of experimenting with these plums for a refreshing plum sauce which actually goes surprisingly well with the chicken! Without further ado, let me introduce you to this 3-in-1 combo!


To prep the chicken and create the batter,
You will need:
(4 servings)
1kg of chicken (choice of mini drumsticks and chicken wings)
some salt and pepper
milk
110g cornstarch
55g plain flour
55g glutinous rice flour
1/2 tsp baking soda
1 egg
1. Marinate and tenderize the chicken with some milk, salt and pepper in a large mixing bowl.
2. Beat an egg, add it into the mixing bowl and mix it thoroughly so all the chicken surface is covered with egg mixture.
3. Add in the dry ingredients and mix it thoroughly so that the batter reaches every part of the chicken pieces.
4. To deep fry, in a saucepan, add in enough oil that can cover at least half of the chicken. Heat it and to test the temperature, test it by dropping some batter pieces into the oil and if it sizzles, it is good to go!
5. Deep fry one side of the chicken for about 10mins till it turns golden brown. Then flip over and repeat the same procedure. Once it is done on both sides, then remove it from the pan and let it chill for a few mins and then deep fry the second time to make it more crispy.
For the sauces,
a) Korean style marinate

Ingredients:
1.5 tbs korean red pepper paste
3 tbs ketchup
1 tbs honey
1.5 tbs vinegar
Mix all of these ingredients and you may heat it to serve it warm (optional). You may serve it as a dipping sauce or directly coat the chicken with the sauce for a more thorough taste.
b) Plum sauce

Ingredients:
5 plums
sugar
~2tbsp honey
1. Mash up the plums.
2. Add in some sugar to balance out the sourness of the fruit and put it in the microwave on low heat to allow the sugar to melt.
3. Add in some honey to create a thicker consistency.
Don't forget your good ol' ketchup! As another bonus tip, you may also eat your yummy chicken in another way that is very common in Korea - with some thinly sliced spring onions!Its fragrance goes extremely well with the chicken!

So my sister and I ended Boxing Day by watching anime - Totoro while enjoying our chicken with smoothie. ^•^
Belated Merry Christmas and Happy Boxing Day Everyone!
Sunday, 25 December 2016
Pork Chop kinda Night~
It's been a long while again since I posted a recipe. Finally, this year's Christmas is soon arriving, finally some time to rest after another hectic term. Today's main is going to pork chop cooked with herbs served with rice and veggies.

You will need:
(2 servings)
2 portions of rice
2 pieces of pork chop
1 potato ( or half if the potato is massive)
1 carrot
1/2 tomato
1 sprig of rosemary
salt and pepper
basil herbs
1 onion
1. Marinate the two slices of pork chop by sprinkling it with salt, pepper and some basil and massage the seasonings in. Leave it for 15-20 mins while prepping for other ingredients.
2. Cook two portions of rice in the rice cooker.
3. Peel and cut the potatoes into small chunks, carrots into jardiniere and tomatoes into wedges. Cut also the onions into thin pieces.
4. Heat the pan with some oil. Then place the pork chops in the pan and onions on the side along with the rosemary sprig. Cook on medium heat.

5. Allow one side to cook and then flip over once it is slightly golden brown.
6. Remove off the heat when the meat is fully cooked and golden brown on both sides.
7. Boil the carrots till soft. Drain the water.
8. Heat the pan with some oil and fry the potatoes with some salt and basil. Add in the rosemary that was used for cooking. Once the potatoes are slightly golden brown, add it some water and cook it till the inner is soft. Pour away any excess water once its cooked. Add in the boiled carrots and tomatoes.
9. Add more basil and salt to give the veggies more flavour.
10. Serve it on a plate. Bon Appetit!


You will need:
(2 servings)
2 portions of rice
2 pieces of pork chop
1 potato ( or half if the potato is massive)
1 carrot
1/2 tomato
1 sprig of rosemary
salt and pepper
basil herbs
1 onion
1. Marinate the two slices of pork chop by sprinkling it with salt, pepper and some basil and massage the seasonings in. Leave it for 15-20 mins while prepping for other ingredients.
2. Cook two portions of rice in the rice cooker.
3. Peel and cut the potatoes into small chunks, carrots into jardiniere and tomatoes into wedges. Cut also the onions into thin pieces.
4. Heat the pan with some oil. Then place the pork chops in the pan and onions on the side along with the rosemary sprig. Cook on medium heat.

6. Remove off the heat when the meat is fully cooked and golden brown on both sides.
7. Boil the carrots till soft. Drain the water.
8. Heat the pan with some oil and fry the potatoes with some salt and basil. Add in the rosemary that was used for cooking. Once the potatoes are slightly golden brown, add it some water and cook it till the inner is soft. Pour away any excess water once its cooked. Add in the boiled carrots and tomatoes.
9. Add more basil and salt to give the veggies more flavour.
10. Serve it on a plate. Bon Appetit!

Sunday, 13 November 2016
Mapo Tofu~
I recently bought a jar of doubanjiang (Broad bean paste) from my local Asian groceries store. So I thought, why not make some Mapo tofu? I have only had it in restaurants but never made it myself. I had a look at recipes online and realised it's actually much more simple than I thought! 1-2 spoonfuls for broad bean paste does the magic! So let's begin!

You will need:
(2 servings)
300g of tofu
~150g mince pork
1 onion
1 stalk of green spring onions
1 clove of garlic
2 tbsp doubanjiang
1/3 cup of water
1 tbsp of soy sauce
1 tsp of sugar
1tsp of corn flour.
some ground black pepper
Method:
1. Marinate the mince pork with soy sauce, ground pepper sugar, and corn flour.
2. Finely chopped the spring onions, onions and mince the garlic.
3. Cut the tofu into small cubes.
4. Heat a wok/pan with oil. Add in the garlic and onions. Fry until you can smell the aroma.
5. Then add in the mince meat. Fry until 60% cooked then add in the spring onions. Cook until 90% cooked.
6. Add in the doubanjiang and fry for a minute or two. Then add in the water.
7. Add in the tofu and gently mix it with the sauce. Fry until the sauce thickens.
8. Serve it with rice.

Monday, 31 October 2016
Sweet and sour chicken
It's been a long long longggggg while since I last updated this blog. Have to admit that I have been quite lazy these days despite living a busy life. But still, however busy I am, I do not skip meals, so not updating my blog does not mean I have not been eating well. In fact I have been blessed with two great flatmates who has been making home food like Chinese soup, congee etc Really touched and am feeling the warmth from them am grateful about this. I am also very lucky to be allocated to a flat with a brand new kitchen, now I am so much more motivated to try out new recipes! I even purchased some baking tools even this is my last year in uni, as I really want to make the most out of this brand-new and well equipped kitchen!
Without further ado, let me present you with this sweet and sour chicken! I did not know sweet and sour sauce is that easy to make until I heard the recipe from my friend!

Main Ingredients:
(2-3 servings)
300g chicken thigh fillets
4 pineapple rings(canned) (diced)
1 paprika pepper
Marinate:
1tbsp Soy sauce
1 tsp sugar
1 tsp cornflour
Sauce:
4 tbsp Ketchup
2 tbsp White Vinegar
5 tbsp Pineapple juice from the canned pineapple
2 tsp of sugar
1 tsp cornflour and some water
Method:
1. Cut chicken thighs into smaller pieces and marinate with soy sauce, sugar and cornflour.
2. Cut the paprika and pineapple rings.
3. Slightly fry the pineapple for a minute and that can keep the juice in the pineapples, making it more juicy when served. Remove it from pan.
3. Fry the chicken with a bit oil until almost cooked, add in pineapple juice, ketchup, vinegar and sugar.
4. let it cook and then adjust the taste accordingly.
5. Add in the pineapples and peppers.
6. In a little bowl, dissolve some cornflour with cold water and then add that into the pan, this helps thicken the sauce.
7. Make sure you do not leave the peppers cooking for too long or else it will become soggy.
8. When the sauce is thickened, it's ready to serve with rice.

Monday, 11 January 2016
Pad Thai
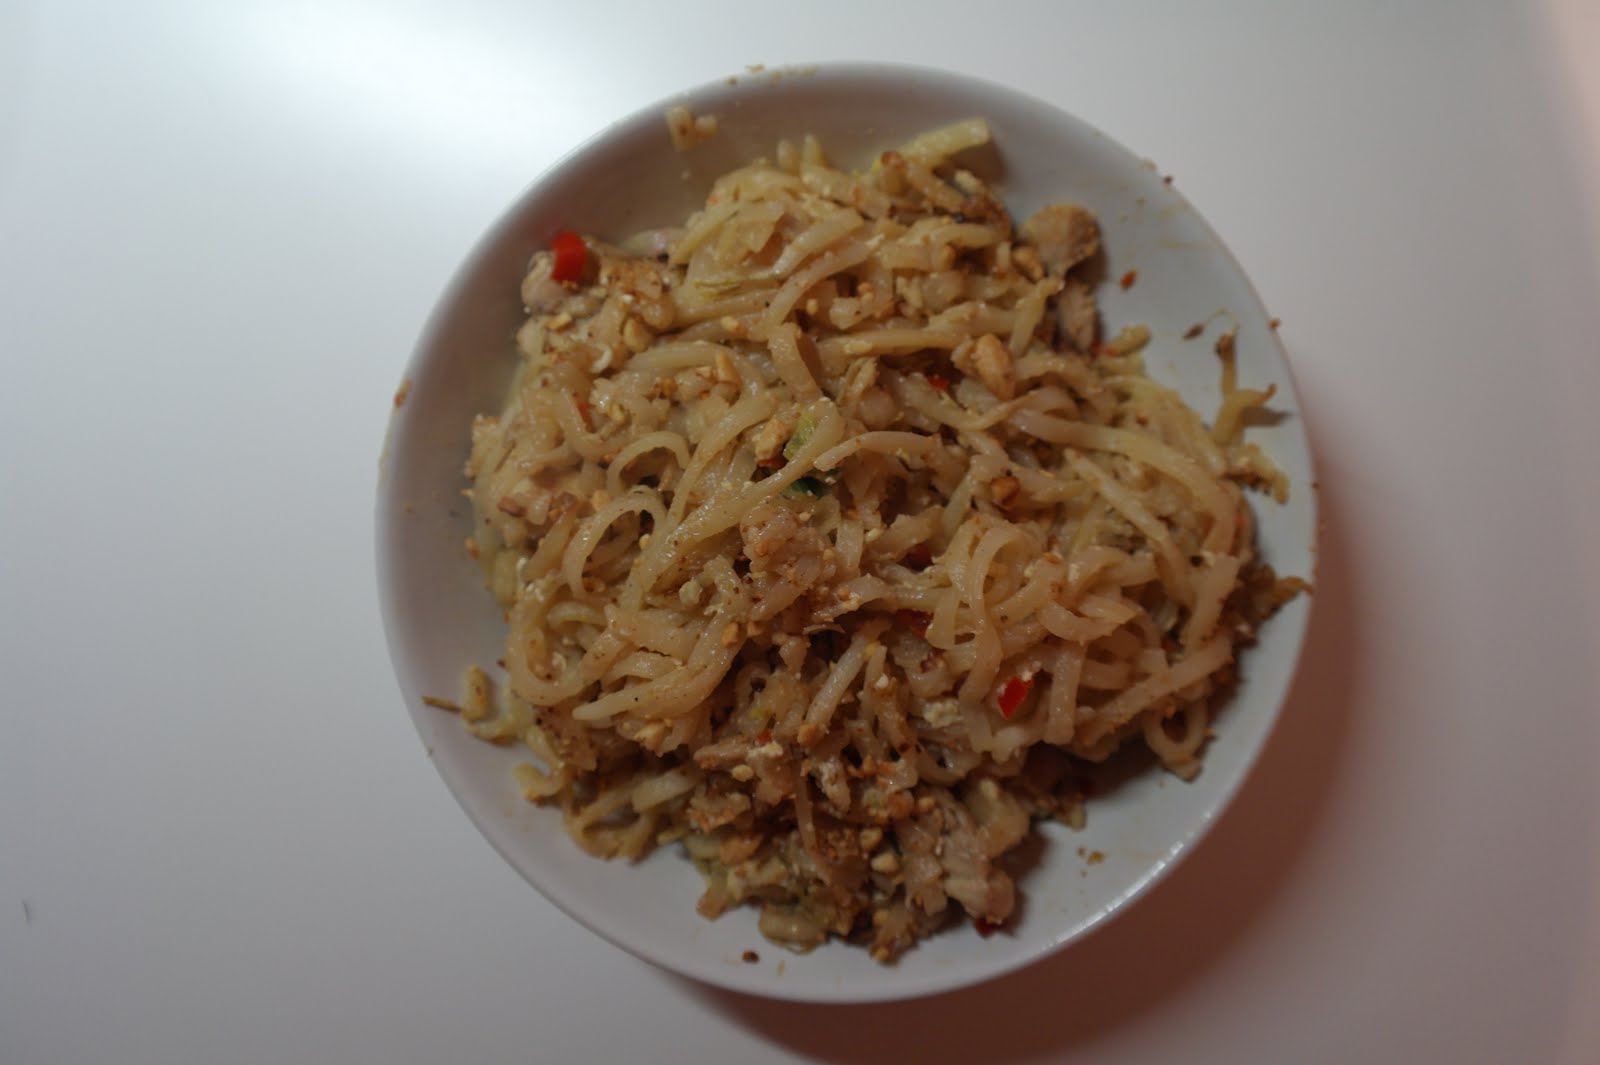
Looks like this is going to be my first post on Thai cuisine!(If counting the fried rice on the previous post, that makes this the second post?) My family and I are all really into Thai and Vietnamese food, majority of the times we eat out, we go to a Thai/Vietnamese restaurant, but never did we ever made them ourselves at home. Now that I am back in the UK, it is not as easy to find a Thai restaurant here, so today I decided to try out this recipe making Pad Thai!
 You will need:
(2 servings)
200g Pad Thai noodles
3.5 boneless chicken thighs
beansprouts
4 eggs
spring onions
onions
1 clove of garlic
1/2 hot red chili
handful of peanuts
salt and pepper
For the sauce:
1 lime
1 clove of garlic
1/2 hot chili
8 tbsp fish sauce
7 tbsp soy sauce
2 tbsp Thai sweet chili sauce
(6 tbsp Tamarind sauce) I did not use this because I could not find it in stores here but it tasted just as good without.
2tbsp sugar
Method:
1. Soak the Pad thai noodles with hot boiling water for 5mins. Meanwhile, crush the peanuts and roast it on a frying pan.
2.Cut the chicken thighs into smaller pieces and marinate it with some salt and pepper.
3. Prepare the ingredients: Dice the garlic, spring onion, and hot red chilies. Cut the spring onions to about 3cm long.
4. Prepare the sauce. Crush and dice up the garlic and hot chili. Squeeze the lime to get the lime juice. Then add all the ingredients to the pan and cook till the sugar completely dissolves. Taste it and make adjustments according to your own preference.
5. In a frying pan, add some oil, once heated, add in the spring onions, garlic, and spring onions. Fry it for 1-2 mins then add the chicken. Cover with a lid to allow the chicken to retain the garlic and onion fragrance.
6. While the chicken is cooking, drain the noodles and wash it with cold water.
7.When one side of the chicken is cooked, remove the lid and turn the chicken over, fry it for awhile then add in the hot chili. Add in the noodles and extra oil. Add in the sauce and fry the noodles until well mixed. Add in 4 eggs and keep frying the noodles until the eggs are scrambled and cooked.


 You will need:
(2 servings)
200g Pad Thai noodles
3.5 boneless chicken thighs
beansprouts
4 eggs
spring onions
onions
1 clove of garlic
1/2 hot red chili
handful of peanuts
salt and pepper
For the sauce:
1 lime
1 clove of garlic
1/2 hot chili
8 tbsp fish sauce
7 tbsp soy sauce
2 tbsp Thai sweet chili sauce
(6 tbsp Tamarind sauce) I did not use this because I could not find it in stores here but it tasted just as good without.
2tbsp sugar
Method:
1. Soak the Pad thai noodles with hot boiling water for 5mins. Meanwhile, crush the peanuts and roast it on a frying pan.
2.Cut the chicken thighs into smaller pieces and marinate it with some salt and pepper.
3. Prepare the ingredients: Dice the garlic, spring onion, and hot red chilies. Cut the spring onions to about 3cm long.
4. Prepare the sauce. Crush and dice up the garlic and hot chili. Squeeze the lime to get the lime juice. Then add all the ingredients to the pan and cook till the sugar completely dissolves. Taste it and make adjustments according to your own preference.
5. In a frying pan, add some oil, once heated, add in the spring onions, garlic, and spring onions. Fry it for 1-2 mins then add the chicken. Cover with a lid to allow the chicken to retain the garlic and onion fragrance.
6. While the chicken is cooking, drain the noodles and wash it with cold water.
7.When one side of the chicken is cooked, remove the lid and turn the chicken over, fry it for awhile then add in the hot chili. Add in the noodles and extra oil. Add in the sauce and fry the noodles until well mixed. Add in 4 eggs and keep frying the noodles until the eggs are scrambled and cooked.


Shengjian Mantou 生煎包
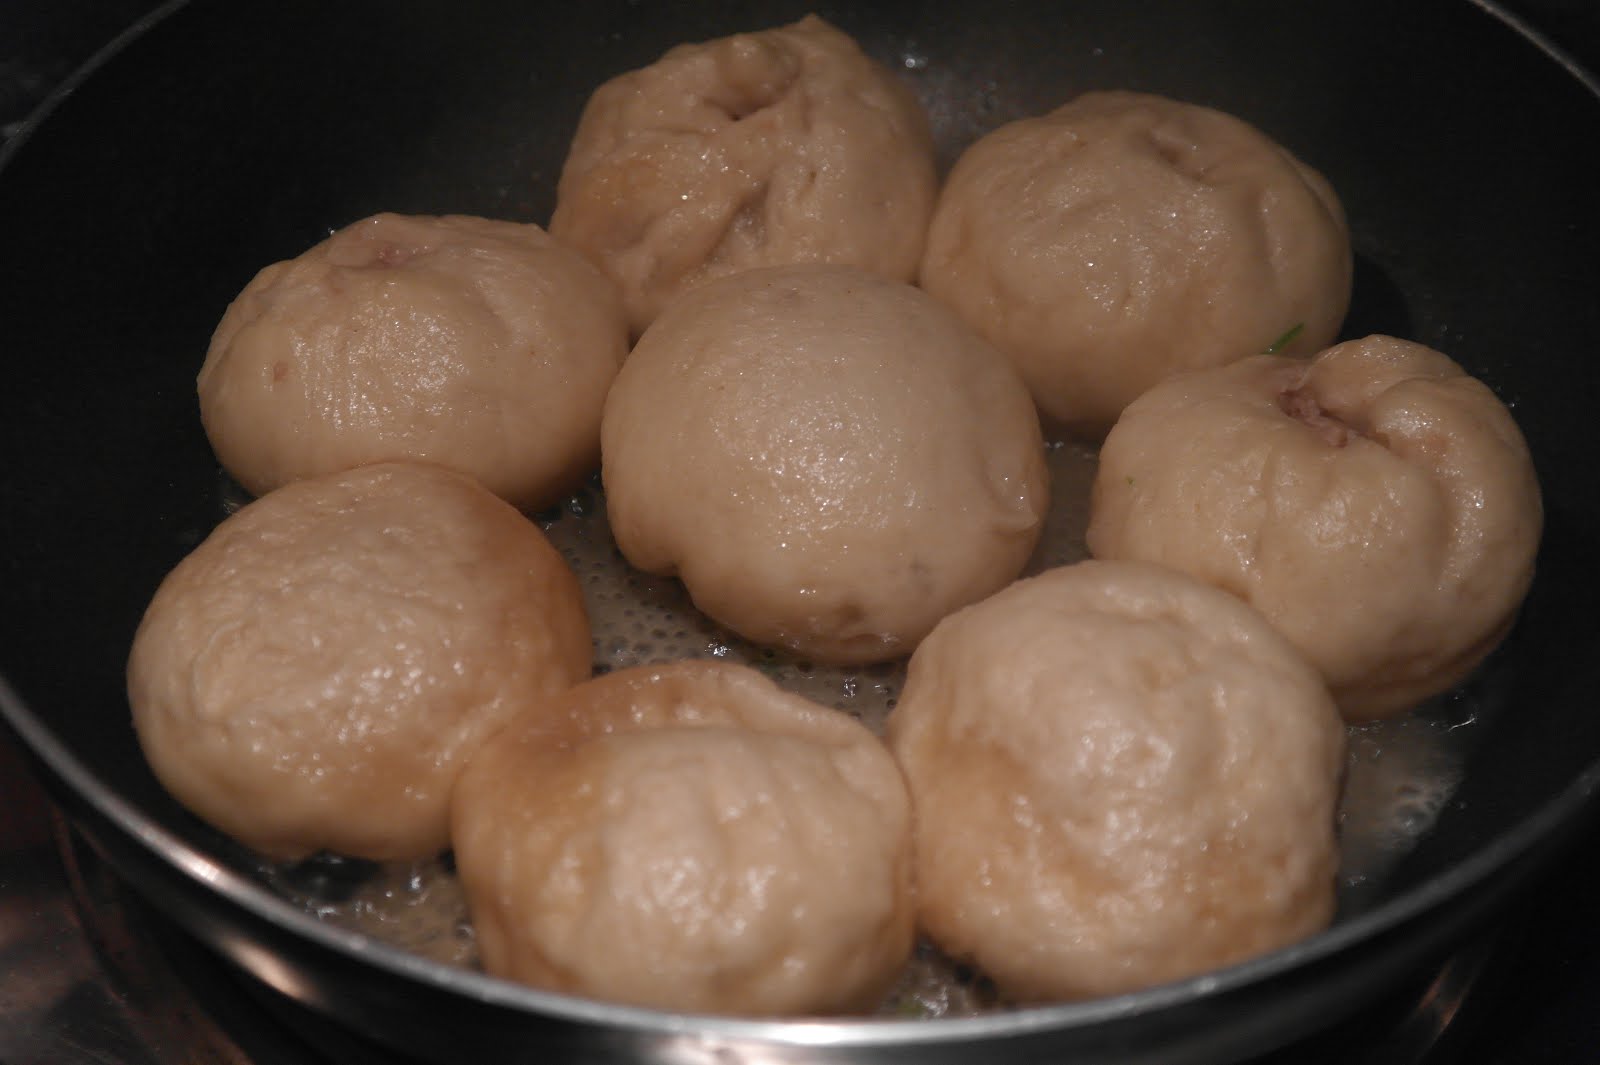
Just for the Christmas Holidays, I tried making this Chinese Style Shengjian Mantou as I was craving it while watching Youtube videos and I thought I'll make it right away following the recipes on Youtube.

You will need:
Ingredients for marinating mince pork filling:
Pepper
salt
water
soy sauce
sesame oil
ginger
spring onion
cooking oil
For the dough:
400g Plain flour
40g sugar
4g yeast
200g warm water
Method:
1. First, to create the dough, add in the sugar and yeast and warm and stir it till it dissolves. Then let it sit for 5-10mins. Add in the plain flour and using yours and spatula, knead it till a dough forms and let it rise for 45 mins to 1hr.
2. Meanwhile, marinate the meat using appropriate amounts of the ingredients above. Make sure you add the water little by little at intervals. By adding little bit of water to the mince, it makes it filling more juicy. Stir the meat with utensils until it forms almost like a "paste".
3. When the dough is ready, knead and fold the dough a few times to let the air out and folding it creates more texture. Then divide the dough into the size of a golf ball.
4. Press the golf ball-sized dough flat on your palm while keeping it circular in shape, and add a tbs of mince filling in the center. Then starting at any point of the circular edge, go around the whole circumference picking up the edges and gather it with your fingers towards the middle using pinching motions. Make sure the mince filling is well-sealed inside. Repeat the same with the rest of the douh.
5. Add some oil to a frying pan and let the buns sit in the pan. Fry in pan for 3 mins with lid on and (optional, turn over and fry the other side for another 3 mins).
6. Add 1 cup of water to pan, then cover the pan with a lid for 8-10 mins.
7. Alternatively, you can choose the steam cook version for a healthier option. To do this, add in some hot water in a rice cooker or wok with a steam rack in it. Then place the buns in the steam rack and let it steam for 12-15mins.


You will need:
Ingredients for marinating mince pork filling:
Pepper
salt
water
soy sauce
sesame oil
ginger
spring onion
cooking oil
For the dough:
400g Plain flour
40g sugar
4g yeast
200g warm water
Method:
1. First, to create the dough, add in the sugar and yeast and warm and stir it till it dissolves. Then let it sit for 5-10mins. Add in the plain flour and using yours and spatula, knead it till a dough forms and let it rise for 45 mins to 1hr.
2. Meanwhile, marinate the meat using appropriate amounts of the ingredients above. Make sure you add the water little by little at intervals. By adding little bit of water to the mince, it makes it filling more juicy. Stir the meat with utensils until it forms almost like a "paste".
3. When the dough is ready, knead and fold the dough a few times to let the air out and folding it creates more texture. Then divide the dough into the size of a golf ball.
4. Press the golf ball-sized dough flat on your palm while keeping it circular in shape, and add a tbs of mince filling in the center. Then starting at any point of the circular edge, go around the whole circumference picking up the edges and gather it with your fingers towards the middle using pinching motions. Make sure the mince filling is well-sealed inside. Repeat the same with the rest of the douh.
5. Add some oil to a frying pan and let the buns sit in the pan. Fry in pan for 3 mins with lid on and (optional, turn over and fry the other side for another 3 mins).
6. Add 1 cup of water to pan, then cover the pan with a lid for 8-10 mins.
7. Alternatively, you can choose the steam cook version for a healthier option. To do this, add in some hot water in a rice cooker or wok with a steam rack in it. Then place the buns in the steam rack and let it steam for 12-15mins.

Saturday, 9 January 2016
Sausage Buns, the Hong Kong Style!
The first semester was over and I finally had more time to do some baking. Today I am sharing with you how to make sausage buns. It's a common bun that you can find in almost every bakery shop you go into in Hong Kong. As I only moved into my flat for a few months and haven't been baking much, I was not used to the oven here and it was a bit burnt on the top. But nevertheless it was still good. Actually while typing this post, I just made another batch and am waiting for it to rise. This time I am going to shorten its time in the oven and hopefully it will turn out just right.
 You will need:


 You will need:
(8 buns)
1 egg
130ml warm milk
250g bread flour
3g (1tsp) yeast
1/4 tsp salt
60g sugar
20g butter/ 2tbs oil
4-5 frankfurter sausages
water
Method:
1. Add in the flour, yeast, salt and sugar into a large mixing bowl. Mix.
2. Warm the milk in the microwave for 10 secs.
3. Beat the egg and add that to the milk.
4. Slowly pour the egg and milk mixture to the mixing bowl as you mix it with your hands or spatula.
5. Knead the dough with your hands and add in the oil/butter, carry on kneading until the dough does not stick to your hands/mixing bowl. If the dough is still too moist and sticky, add in more bread flour little by little at a time so you are not adding in excess.
6. Cover your bowl of dough and let it rise for 30-45 mins.
7. Meanwhile, prepare the sausages by cutting them in half and fry it for a few mins. Line your baking tray with some aluminium foil or parchment paper. Brush it with oil/butter.
8. After 30-45mins, take the dough out and spilt it into 8 equal portions. With each portion, roll it out flat and roll it up like a swiss roll, this can be done roughly, This gives the buns more texture when its baked. Then roll out your "swiss roll" so it is 1.5 to 2 times longer than the length of the cut sausages.
9. Wrap the sausages around with your dough keeping the two ends at the bottom. The length of the dough should be enough for you to go round the sausage 1-3 times. Repeat the same for all the dough.
10. Let it sit for another 30 mins. Then brush a layer of water on the top or you can use an egg yolk.
10. Let it sit for another 30 mins. Then brush a layer of water on the top or you can use an egg yolk.
11. Preheat the oven to 180-200C and bake the buns for 12-14 mins.


Friday, 8 January 2016
Sweet Korean Stuffed Pancakes (호떡)
Today's recipe is a street food that I regret not trying whilst in South Korea for vacation a few years ago. It is the sweet Korean stuffed pancakes. Its a chewy sweet pancake with brown sugar, peanuts and cinnamon filling. Since I did not know how the authentic version tastes but I followed a Korean blog recipe making these and I thought it tasted wonderful and kinda taste like the sweetheart cakes (老婆餅) in Hong Kong. There are many different variations to this street food snack where there are different fillings like green tea and cheese.

You will need:
(15-18 pancakes)
For the dough:
115g Glutinous Rice flour
570g plain flour
6g yeast
1 tsp sugar
125ml warm water
250ml milk
1/2 tsp salt
For the filling:
150g brown sugar
1/2 tsp cinnamon
some crushed peanuts (optional)
Other ingredients:
cooking oil
Method:
1. Mix the warm water with the yeast and sugar and let it sit for 5-10mins.
2. Add in the other dry ingredients and then slowly add the milk as you mix and knead.
3. Keep kneading until the dough does not stick to your hand.
4. Let the dough rise at a warm temperature for 1hr.
5. Prepare the filling by mixing in all the ingredients thoroughly.
6. The dough should rise to double of its original size. Then divide the dough into smaller pieces that is the size of a golf ball.
7. Press it slightly flat on your palm and add a tbs of the filling. Then going round and picking up the edges of the dough, gather the dough together so that the filling is well sealed inside the dough. Repeat the process for all the others.
8. Oil the frying pan, add in the pancakes and with gently press the pancake down flat with a spatula. Allow it to cook for around 8-12 mins until it turns golden brown. Then turn the pancakes over and fry the other side for another 8-12 mins so that both sides are golden brown.


You will need:
(15-18 pancakes)
For the dough:
115g Glutinous Rice flour
570g plain flour
6g yeast
1 tsp sugar
125ml warm water
250ml milk
1/2 tsp salt
For the filling:
150g brown sugar
1/2 tsp cinnamon
some crushed peanuts (optional)
Other ingredients:
cooking oil
Method:
1. Mix the warm water with the yeast and sugar and let it sit for 5-10mins.
2. Add in the other dry ingredients and then slowly add the milk as you mix and knead.
3. Keep kneading until the dough does not stick to your hand.
4. Let the dough rise at a warm temperature for 1hr.
5. Prepare the filling by mixing in all the ingredients thoroughly.
6. The dough should rise to double of its original size. Then divide the dough into smaller pieces that is the size of a golf ball.
7. Press it slightly flat on your palm and add a tbs of the filling. Then going round and picking up the edges of the dough, gather the dough together so that the filling is well sealed inside the dough. Repeat the process for all the others.
8. Oil the frying pan, add in the pancakes and with gently press the pancake down flat with a spatula. Allow it to cook for around 8-12 mins until it turns golden brown. Then turn the pancakes over and fry the other side for another 8-12 mins so that both sides are golden brown.


Crispy Fried Rice
Most of the recipes I posted previously were results from references I took from many random online recipes and trying it out and see what works best and what can be improved. But this recipe was just a random one that I "created" since I was just grabbing ingredients I can find at home and cooked it according to my gut feelings. I was intending to making ginger fried rice and I did not have enough ginger and barely was there any ginger taste. The fried rice was just bland and the fish sauce caught my sight, and it turned out surprisingly yummy! It's got the Thai/Vietnamese vibe to it. Wonder if an actual recipe like this exist? Maybe in Thai/Vietnamese cuisine I reckon?

You will need:
(3 servings)
150g mince pork
3 bowls of leftover rice
soy sauce
sugar
cornflour
4-5 slices of ginger
1 spring onion
oil
fish sauce
oyster sauce
I actually had ginger in it like I said I was going to make ginger fried rice but tweaked it half way so I didn't include it as it is not really necessary for this special fried rice that I "created".
Method:
1. Marinate the meat with soy sauce, sugar and corn flour.
2. Mince the ginger and spring onion.
3. In a heated frying pan, add in some oil and ginger. Fry it until you smell the ginger fragrance.
4. Add in the rice, fry until the rice are separated individually. Add in more oil accordingly if the pan is too dry.
5. Remove the rice from the pan. Add in some oil and fry the meat until cooked, Add in some oyster sauce to give more flavouring.
6. Add the rice to the mince pork, keep stir frying it so they are well mixed. Add in more oil and also the spring onions. Stir fry.
7.Here is where the magic comes in-- FISH SAUCE!! Add in 5-6 tsp of fish sauce. Stir fry.
8.To create the crispy effect evenly spread the rice and mince pork on the frying pan and leave it for 2 mins and stir fry. Then repeat once. This should make the rice turn golden brown. Taste it and adjust the taste accordingly.
9. Finally, add in a pinch of salt and stir fry it for another 1-2 mins and you are ready to serve!
Sunday, 29 November 2015
Healthy Pumpkin Rice!
There are always times where there is a bit of everything left behind in the fridge that are waiting to go expire that we almost forgot about it. Now it's the time for me to take them all out and do something with it. I came across this pumpkin rice while watching TV, so I decided to use that idea but use butternut squash instead of pumpkin since that's what I have leftover from making carrot soup (which the recipe I will put up in the next post, so stay tuned!). I also add a few more ingredients that I found in my fridge that has been sitting in there for awhile:P


You will need:
(5 servings)
1/4 butternut squash
180g beansprouts
200g mince pork
white cabbage
rice
soy sauce
sugar
cornflour
oyster sauce (optional)
Method:
1. Since it's really hard to get the skin off the butternut quash, so first cut the butternut squash into smaller chunks. Remove the seeds inside as well. Then put them to boil for a few mins so as the squash softens, it becomes easier to remove the the skin, just cut away the skin with a knife and cut the chunks into smaller bite size pieces.
2. Prepare the rice in the rice cooker. use 85% of water that you would normally use for the rice. After 5mins, add in the squash so it covers the rice but still being in the water.
3. Wash and cut the white cabbages into bite size pieces. Then let it boil until it softens. Add some alt to give it some flavour.
4. Wash the beansprouts and in a pan, add in some oil and stir fry the beansprouts for 3mins and then add in a little bit of water and some salt to let it cook for 4 mins. Then take it off the heat.
5. Marinate the meat with some soy sauce, sugar and cornflour. Cook the meat and add in the bean sprouts. You may add some oyster sauce to give more flavour.
6. Once the rice is ready, mix it with the rest of the cooked ingredients.
Note:
- You can create your own variation of this with other ingredients too! For example, you may use chicken thighs instead, or add in some spinach, eggs, sweetcorn etc and create your own tailor made healthy rice.
- The rice I used has mixed grains in it and this dish is rich in vegetables(nutritious!.) Not much oil was involved since majority of the ingredients were prepared through boiling! Healthy option for sure!


Saturday, 28 November 2015
Breakfast time!
Thought I'd share with you one of my favourite ways of having toast for breakfast in the morning. Peanut butter with bananas on toast!

You will need:
(1 serving)
A slice of bread
1/2 banana (sliced)
Peanut butter
Method:
1.Toast a slice of bread with a toaster.
2. Put some peanut butter spread on your toast. I prefer crunchy peanut butter than smooth:P
3. Place the sliced bananas on top.
4. Best served with milk. Personally find that almond milk is a better match to go with the toast.
Of course, you may use Nutella spread instead, or a mix of both? I've tried all ways and all are equally delicious! Definitely the best breakfast to wake up to:P


You will need:
(1 serving)
A slice of bread
1/2 banana (sliced)
Peanut butter
Method:
1.Toast a slice of bread with a toaster.
2. Put some peanut butter spread on your toast. I prefer crunchy peanut butter than smooth:P
3. Place the sliced bananas on top.
4. Best served with milk. Personally find that almond milk is a better match to go with the toast.
Of course, you may use Nutella spread instead, or a mix of both? I've tried all ways and all are equally delicious! Definitely the best breakfast to wake up to:P


Friday, 27 November 2015
More Korean Food! Kimchi Tofu Chigae
More Korean food!! I feel this year we are having an early winter here in the UK. Its so cold when it is not even December yet! It is always a good idea to have some hot and spicy soup/food to warm our bodies up and hence today's recipe is going to be Kimchi Tofu Chigae/Kimchi Tofu stew (김치찌개). I was going to post this recipe a lot earlier, however I forgot to take photos last time when I cook this>.< It's been awhile since I last had it, this time I made sure I got the photoshots before digging in:P

You will need:
(4 servings)
4 bowls of rice.
300g chopped kimchi (juice drained)
3 strips of Pork belly or about 200g mince pork
300g tofu
2 carrots
1 onion
2 cloves of garlic (minced)
150ml Kimchi Juice (1.5 cup)
750ml rice water (~ 3 cups)
1/2 tbsp sesame oil
3 tbsp Korean red hot pepper paste (Gochujang)
Method:
1. In a frying pan, stir fry the garlic and onions and kimchi. Add in the meat and stir fry until cooked.Add in the red hot pepper paste, some sesame oil and salt.
2. Prepare the rice in rice cooker. Keep the water that was used to rinse the rice.
3.Transfer the ingredients on the frying pan to a large pot and add 1.5 cup of the milky rice water into the big pot. Rice water is preferred as it thickens the soup a little as opposed to using just water.
4. Cut the carrots into thin strips of 5cm long and add them into the pot. Let it cook at high heat for 20-30mins. Taste it and adjust the taste accordingly.
5. Add in the tofu and let it cook for another 5-8mins. Lastly add in some sesame oil.
6. Once the rice is ready, the stew is ready to serve.
Tip: add a tbsp of soybean paste to give the stew a richer taste.


You will need:
(4 servings)
4 bowls of rice.
300g chopped kimchi (juice drained)
3 strips of Pork belly or about 200g mince pork
300g tofu
2 carrots
1 onion
2 cloves of garlic (minced)
150ml Kimchi Juice (1.5 cup)
750ml rice water (~ 3 cups)
1/2 tbsp sesame oil
3 tbsp Korean red hot pepper paste (Gochujang)
Method:
1. In a frying pan, stir fry the garlic and onions and kimchi. Add in the meat and stir fry until cooked.Add in the red hot pepper paste, some sesame oil and salt.
2. Prepare the rice in rice cooker. Keep the water that was used to rinse the rice.
3.Transfer the ingredients on the frying pan to a large pot and add 1.5 cup of the milky rice water into the big pot. Rice water is preferred as it thickens the soup a little as opposed to using just water.
4. Cut the carrots into thin strips of 5cm long and add them into the pot. Let it cook at high heat for 20-30mins. Taste it and adjust the taste accordingly.
5. Add in the tofu and let it cook for another 5-8mins. Lastly add in some sesame oil.
6. Once the rice is ready, the stew is ready to serve.
Tip: add a tbsp of soybean paste to give the stew a richer taste.
 |
| Picture taken as soon as it's cooked! See the smoke? Colour isn't as saturated because of it! |


Subscribe to:
Posts (Atom)